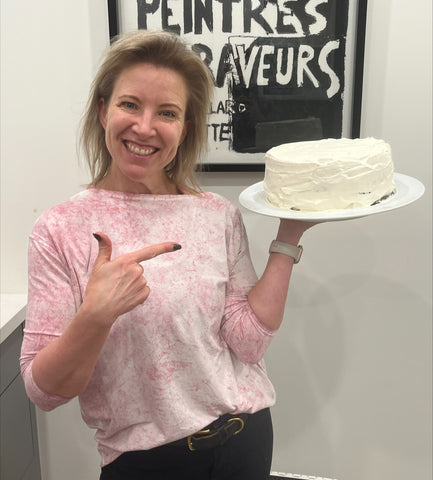
Alison's Favourite Chocolate Cake

We all need a back pocket celebratory cake that is a wow in flavour but super easy to make. This deep, dark chocolate cake, originally from Deb Perelman at Smitten Kitchen, totally fits the bill. It's made with totally simple ingredients, in one bowl with a whisk.
Although originally suggested with Chocolate Ganache frosting (also delicious!), I top mine with super simple whipped cream frosting and filling, then add seasonal fruit, often macerated, sometimes a berry coulis, and sometime a small dollop of vanilla ice cream. No one says no to dessert on these family evenings!
If I'm cooking for a crowd on a weekend day, I make the cake layers before any errands or trips out for the day, to make sure the layers are completely cooled. Then I enlist my son or amazing niece to do the whipped cream to finish off dessert while I'm finishing dinner.
Ingredients:
The Cake
- 1 1/2 cups hot brewed coffee
- 1 cup of semi-sweet chocolate chips
- 2 1/2 cups white granulated sugar
- 1 1/4 teaspoons Kosher salt, like Diamond Crystal
- 3/4 cup vegetable oil
- 1 1/2 cups buttermilk
- 3/4 teaspoon vanilla
- 3 large eggs
- 2 1/2 cups all-purpose flour
- 1 1/2 cups unsweetened cocoa powder
- 3/4 teaspoon baking powder
- 2 teaspoons baking soda
The Whipped Cream
- 2 cups Whipping Cream (lactose free is good too!)
- 1 cup or more Icing Sugar (to taste)
Optional Adds
- Fresh berries, as they are or sliced and macerated, in a simple coulis
Method:
Preheat oven to 300°F and make the coffee. If you don't have buttermilk, and I never do, add regular milk (lactose free is fine!) to a 2 cup glass measuring cup and add a tablespoon and a half of fresh squeezed lemon juice to the milk. Let it sit for at least 5 minutes.
Cut Parchment paper into 9" rounds and place inside two 9" round cake pans (at least 2" high). If they are non-stock pans (we love USA PAN for these), this is all you need. If yours are non non-stick, grease the pans on the insides that are not covered with the parchment rounds.
Put the chocolate chips into a large glass mixing bowl (we love the Duralex 31cm) and pour the hot coffee over them. Let sit for 2-3 minutes, then whisk until the chips have melted into the coffee. Whisk in the sugar, salt, oil, buttermilk, and vanilla until combined.
The buttermilk may look lumpy (and not too appetizing!) - it's all good, it'll smooth out in the whisking. Then whisk in the eggs, one at a time.
Measure out all of your dry ingredients. Truth be told, I often use half whole wheat flour with the AP flour here, to add fibre for my boys wherever I can, no one notices!
Holding an 8" sieve (or baking sieve like the one from Fox Run) over the bowl with the wet ingredients in it. Add all of the dry ingredients to the sieve. Shake and tap the sieve until all of the dry ingredients are on top of the wet ingredients. If you use any whole wheat flour, you'll notice that the wheat is sitting in the sieve - just dump it in!
Whisk until everything is smooth. You may see bubbles on the top - totally normal.
Divide the batter between two pans. If you have a scale, tare out with scale with one of the empty pans. The batter for one cake layer weighs about 40 oz - go to 35oz or so before you add batter to the other pan and then even them out.
Bake the cake layers for in middle of oven until a toothpick or butter knife inserted in center comes out clean, about 1 hour and 10 minutes.
Let the pans cool for at least 10 minutes, then carefully flip them out onto a cooling rack and carefully remove the parchment paper, cooling the layers completely.
For the Whipped Cream frosting, pour the cream into a large bowl (or the bowl of a standing mixer fitting with the whipping attachment). Add a cup of icing sugar and start whipping! Adjust with more sugar to your taste. I prefer mine on the less sweet side. When the peaks at super stiff, you are ready to add a good third of it between the cake layers, then over the top and sides of the cake.


Leave a comment